When you first create a Gmail account, you are prompted to enter your name. This name is then used as the default sender name for all emails sent from that account. However, if you want to change the sender name after the account is created, you will need to go to the:
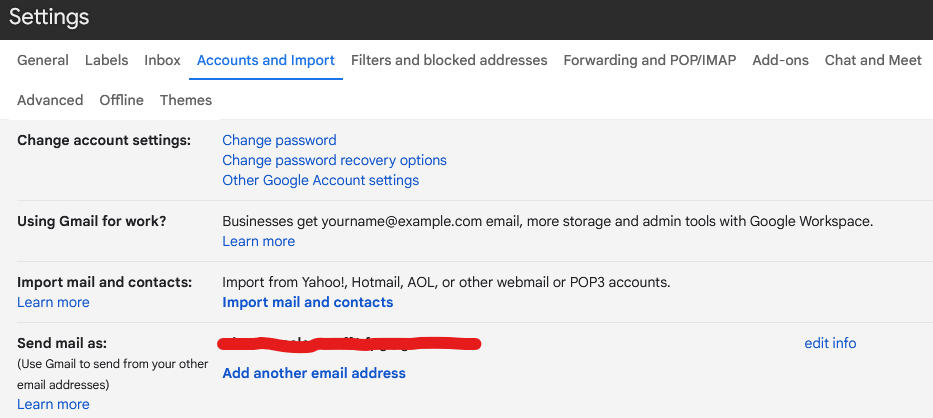
- Gmail Settings and navigate to the “Accounts and Import” section.
- Once you are in the “Accounts and Import” section, you will see an option for “Send Mail As.”
- Click Edit Info.
- Enter the desired name.
- Save Changes.
It’s important to note that the sender name you choose should be professional and appropriate for both personal and business correspondence. A good practice is to use your first and last name or your business name, depending on the purpose of the email.
Changing the sender name in Gmail can be especially useful for those who use multiple email addresses for different purposes. For example, if you have one email address for personal use and another for business, you can use the “Send Mail As” feature to set a different sender name for each address.
In addition to changing the sender name, the “Send Mail As” feature also allows you to set up custom email signatures for each email address. This can be helpful for providing contact information or promoting your business.
In conclusion, changing the sender name in Gmail is a simple process that can be done in the “Accounts and Import” section of the Gmail Settings. Whether you’re using multiple email addresses for different purposes or just want to update your sender name to reflect a change in your personal or business identity, this feature makes it easy to do so. Just remember to choose a professional and appropriate sender name for your emails.
